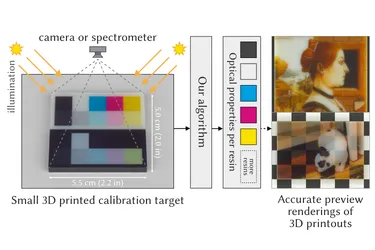
Our ACM TOG paper “Scattering-Aware Color Calibration for 3D Printers Using a Simple Calibration Target” earned an Honorable Mention at SIGGRAPH Asia 2025.
12 Jan 2026
Printing on a PolyJet 3D printer with colors, the result often looks different than the digital 3D model, depending on texture, thickness, and illumination. We explain how to create an accurate, photorealistic preview of the model so you can softproof your design before you print it.
You have surely noticed that when you load a textured 3D object into a slicer software and then you print it, the printout almost never looks like on the computer screen. The most noticeable differences are:
Let’s have a look at a few examples we printed on Stratasys J750 using Vero Vivid (Cyan, Magenta, Yellow), BlackPlus and PureWhite materials.
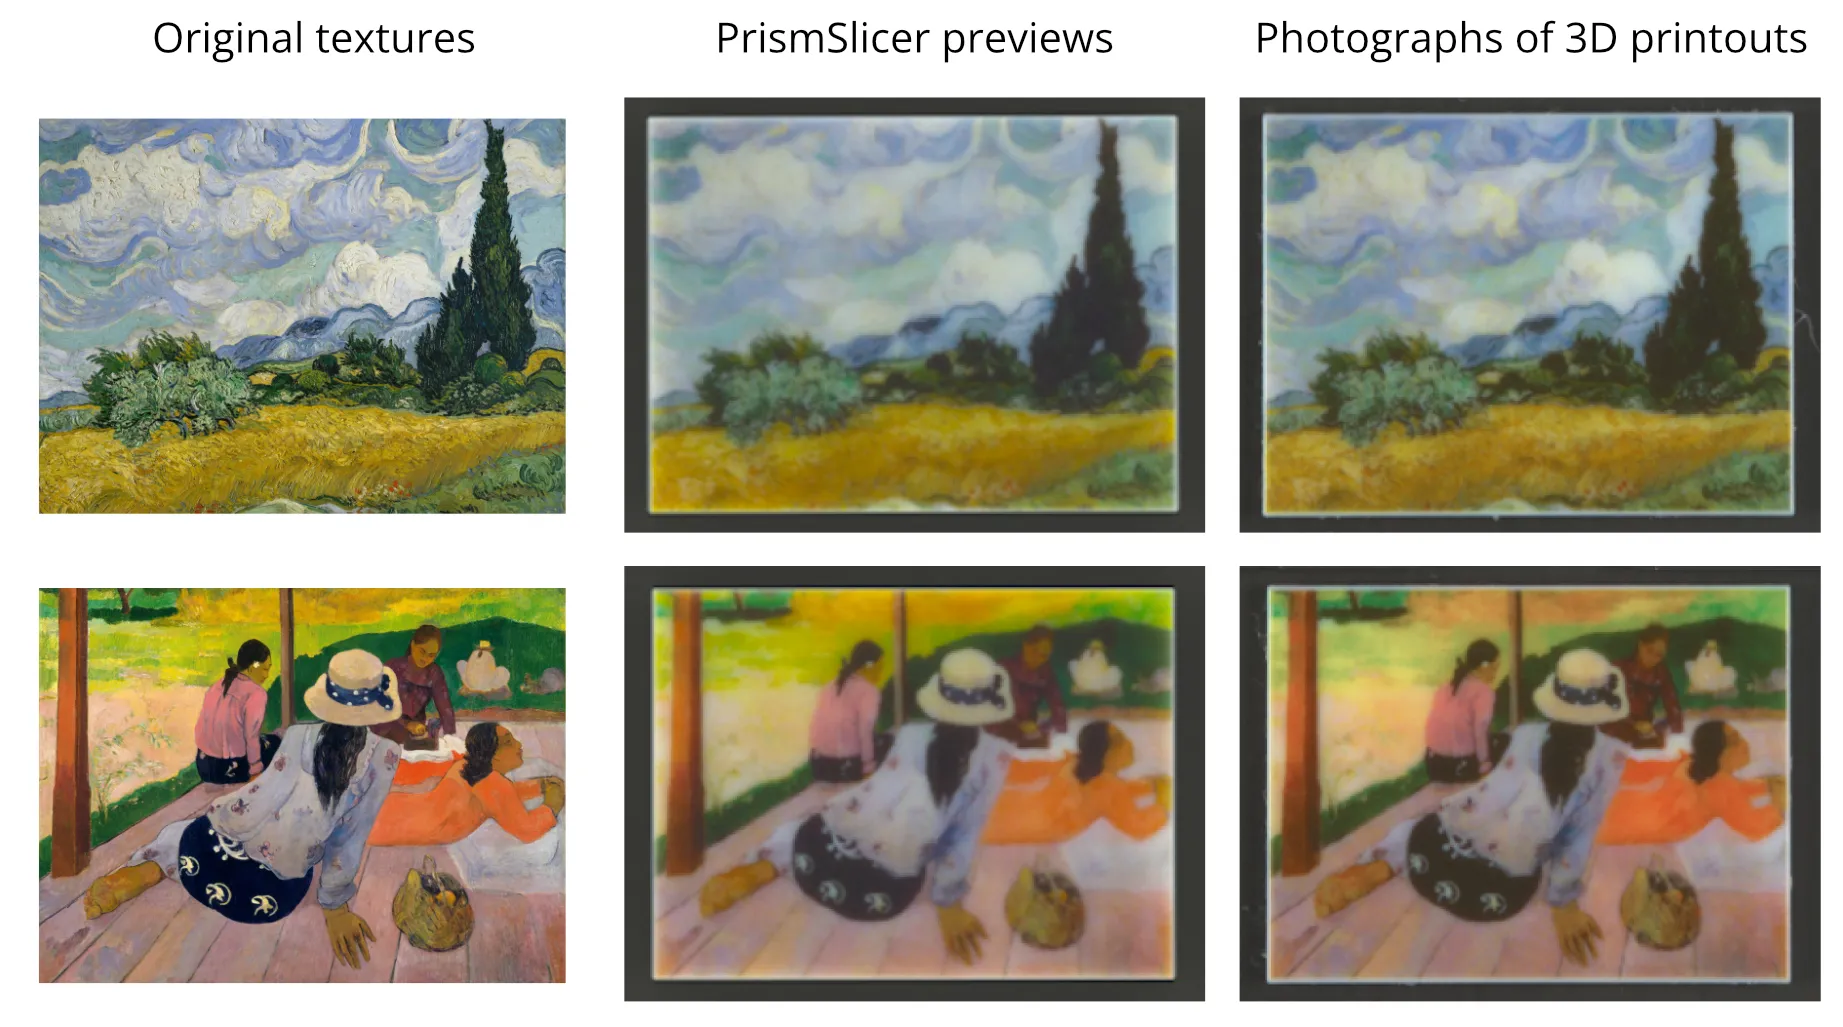
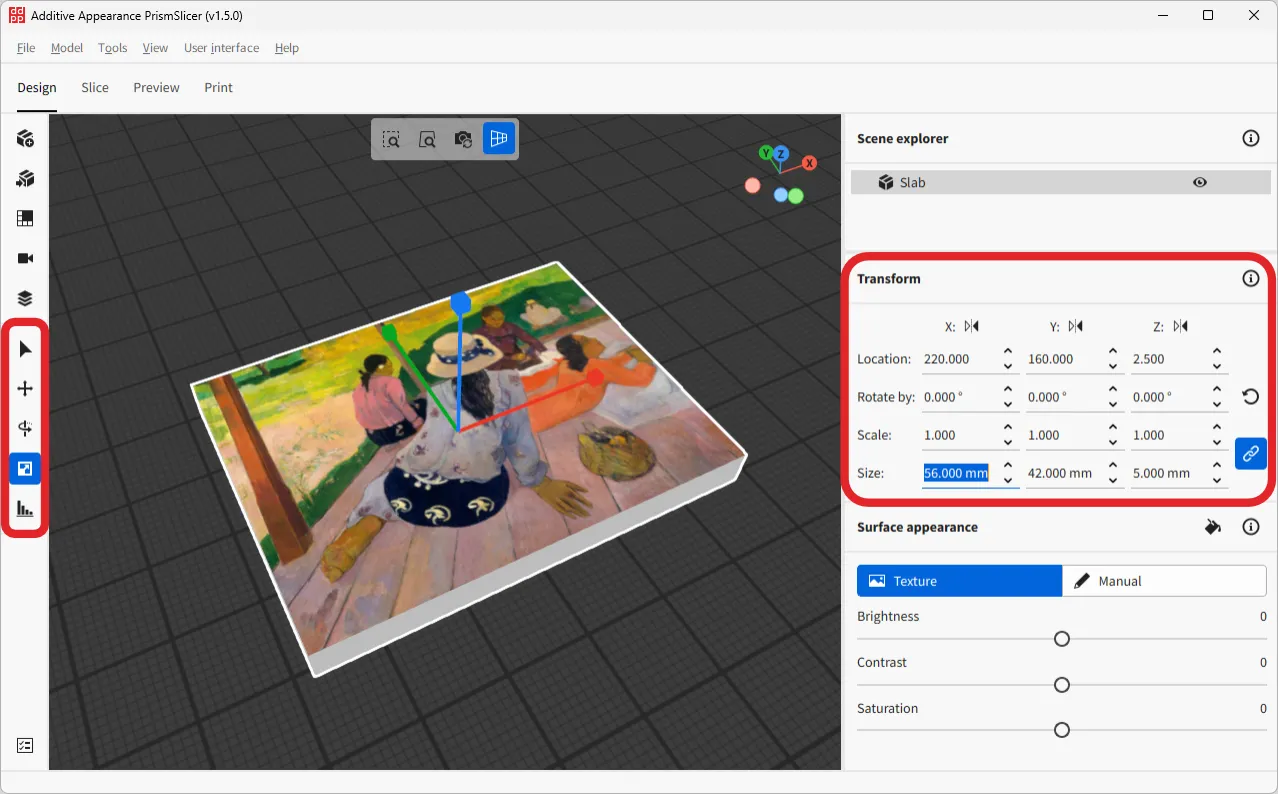
Below are two textured slabs, each 5 mm (0.2 in) thick and 56x42 mm (2.2x1.7 in) wide. The slabs are textured with paintings of Vincent van Gogh (“Wheat Field with Cypresses”) and of Paul Gauguin (“The Siesta”). Below, you can see how the original textures are visualized on the models:

When we actually print the objects and take photographs of the printouts, we will see the following:

At first glance, the printouts are correct, but are they really? Look how much contrast and texture detail was lost during the printing process:
 with photographs of the 3D printed reproduction.")
As another example, we demonstrate translucency. You might have already noticed that when a very thin object is printed, it becomes partially transparent.
 and photos of thin printouts (0.25mm thickness) against a black and white background demonstrating the translucency.")
In standard 3D printing software, it is impossible to visualize these effects. That is why in the next steps, we will use PrismSlicer, which has a photorealistic preview functionality.
To create photorealistic previews, we will use PrismSlicer by Additive Appearance. The software is compatible with Microsoft Windows, Apple Mac OS, and also major Linux distributions such as Ubuntu.
When you download the software, it comes preconfigured for Stratasys PolyJet printers with accurate color calibrations for standard Stratasys resins, including Vero Opaque (Cyan, Magenta, Yellow), Vero Vivid (Cyan, Magenta, Yellow), BlackPlus, PureWhite, UltraBlack, UltraWhite, VeroClear, and with the possibility to request calibrations for other resins as well.

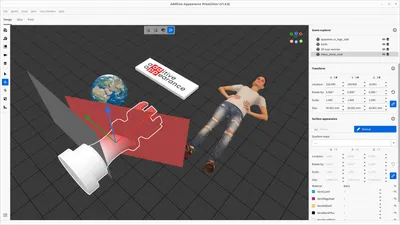
You can also import multiple 3D objects and place them anywhere on the virtual printbed:
 on the printbed.")
Multiple 3D models loaded onto the virtual printbed of PrismSlicer.
Models: “Full body 3D scan” by fablabbudapest and “Realistic Human Eye” by Alexander Antipov
Before we move on to the photorealistic previews, let’s examine how slicing works in PrismSlicer. Slicing is the process of converting the model into a material grid, in other words, into instructions for the PolyJet printer. In the “Slice” tab, the model is automatically sliced layer by layer, and each layer consists of tiny droplets of individual resins (for example cyan, magenta, yellow, black, and white — abbreviated as CMYKW). In software such as GrabCAD Print, you cannot visualize the slices, but you can do so in PrismSlicer.

The slices that were created in the previous step can now be photorealistically previewed in the “Preview” tab of PrismSlicer. For starters, let’s try to preview a single model, “The Siesta” painting by Paul Gauguin from above.

The Preview tab in PrismSlicer allows for adjusting preview settings such as camera field-of-view (FoV), sample count (spp), and image resolution.
When we click on the “Render preview” button, a new window opens where the preview will be iteratively rendered: the image will keep getting updated until it reaches the final state (depending on the “Sample count”, where higher number means longer rendering).

The rendering can take a few seconds but also a few minutes depending on the complexity of the model, the performance of your computer, and so on. We recommend that you first start with smaller objects to test how your computer performs.
In PrismSlicer, you can also render multiple objects at the same time. For example, let’s render “The Siesta” together with the thin bunny slab and a few black and white slabs. We can move the objects around to assemble our scene and then click “Render preview” again:


Several additional options are available, such as the image resolution, camera field of view, and also “Surface roughness”, where we can choose the object’s surface finish from completely polished or lacquered (0.0) to roughly sanded (1.0). By changing this option, we can simulate that the 3D printout was post-processed after printing.
Finally, we can choose from different environment presets to place our object in and see how the object would look like surrounded by different illuminants. Advanced users can also load their own environment (also called HDRI) by downloading them as an EXR image (.exr) from the internet and placing them into the folder that opens with the Plus (➕) button.
 and Surface roughness options highlighted.")

… a preview is much faster than a test print with postprocessing and saves a lot of wasted resin
The quality of the preview starts noisy but increases over time, the longer you let it compute the less noise it will exhibit. In either case, rendering a preview is much faster than a test print with postprocessing and saves a lot of wasted resin. Especially if you are not near a printer or rely on a printing service, that can be a real project saver, as it short-circuits the feedback loop that you need to tune your 3D designs for the printing process.
You might wonder how accurate the previews from PrismSlicer are. For this purpose, we have conducted several experiments and we show a few results below. We used PrismSlicer to prepare a couple of models, which we then printed on Stratasys J750 using the VeroVivid, PureWhite, and BlackPlus resins. Then, we took calibrated photographs of the printouts and compared them to the previews. We can confirm that the previews are highly accurate even for thin, translucent models!
We start with “Wheat Field with Cypresses” and “The Siesta”, printed 5 mm (0.2 in) thick and 56x42 mm (2.2x1.7 in) wide. Here are the results:

The previews are so accurate that we can exactly see which parts of the textures will be affected by the 3D printing process!
You can do the same with any 3D model of your choice. For example, we can preview the translucency of very thin printouts. For this experiment, we loaded two models, one with a photo of a bunny, the other with a photo of a peacock. We sliced them in PrismSlicer and extruded the colors throughout the entire object. We have done the same for three different thicknesses: 0.25, 0.50, and 1.00 mm (0.01, 0.02, and 0.04 in). Let’s see how these printouts look when we place them on a black and white checkerboard paper:

Notice that the thin printouts are highly transparent and that the level of transparency depends on color. The color itself is also affected, with the thinner printouts appearing brighter as the white background shines through them. All of this was previewed in PrismSlicer and it accurately matches photographs of the actual printouts!
Finally, let’s see how we can print models that we sliced and previewed in PrismSlicer.
In order to 3D print exactly the same objects (slices) that we previewed in PrismSlicer, we have to export the files to GrabCAD Print. This uses the .gcvf file format that allows PrismSlicer to tell GrabCAD Print the per-voxel resin distribution in the printout.
In PrismSlicer, we open the “Slice” tab, select the “Stratasys (.gcvf)” file format, and start the export, which saves a new .gcvf file to our disk.
 file which represents exact CMYKW voxel assignments for the printer.")
Then, we open GrabCAD Print and we simply add the .gcvf file as if it was a normal model. This step is simple because GrabCAD Print knows how to process this specialized pre-sliced (voxel) file format.

Notice that the imported .gcvf model does not have any colors visible in GrabCAD Print, but it has the correct shape. Do not worry, the colors are stored in the file and even though GrabCAD does not visualize them, they will be printed correctly! Geometry errors on the GCVF models can simply be ignored, the result will not be affected by it. As usual, supports will also be automatically added.
Most options are disabled on this model, but you can still choose between Glossy and Matte surface finish. Having normal and .gcvf models next to each other on the same tray is no problem.
We would be happy if you shared your own experience with PrismSlicer and photorealistic previews in the comments. Additive Appearance offers customized calibrations to achieve accurate photorealistic previews using different resins, illuminants (tungsten, fluorescent, LED lamps), and so on. The enterprise versions of PrismSlicer also come with Python API support, so you can import objects and render them from your own custom scripts or the command line interface. You can always contact us to discuss a customized solution.
Our ACM TOG paper “Scattering-Aware Color Calibration for 3D Printers Using a Simple Calibration Target” earned an Honorable Mention at SIGGRAPH Asia 2025.

Step-by-step instructions for precisely mixing CMYKW resin kits and previewing the resulting color and translucency on your model.
Press release announcing our new slicer software: A Photorealistic, Color-Optimized Upgrade for Multi-Material 3D Printing